So... It's been about 9 months since my last entry. But that doesn't mean that I haven't gotten anything done, so don't be so quick to judge. Yes, the winter was harsh and with no heat in the garage, I didn't have the fortitude to make much progress. I just had time to come up with more ideas and make changes to my original plan from the comfort of my living room while drinking coffee. And playing Diablo III.
My last post was about getting my wheels painted and assembled. Much has happened since then, so here we go. Please keep in mind that this timeline may be wrong since I can barely remember what I had for lunch yesterday, never mind what I've done over the last 9 months.
Once the wheels were assembled, I got the tires mounted and then put the wheels on the bike. I tried and failed to true them up, so I'll be recruiting a professional to do it and hopefully teach me a thing or two about it. Next in line was motor clean up and reassembly. I had purchased new gaskets and a hardware kit which worked out great. As much as I like a nice polished motor, I don't have the patience or desire to make that happen for this bike, so a good general clean up and a bit of aluminum polish did the trick.
Next I had to get the motor back into the bike so that I could start working on the exhaust, shift linkages, and air intakes. I had a rough idea of how the exhaust needed to mount, and I made an attempt to fabricate some brackets with a piece of scrap metal that I had hanging around. It didn't work out, and I abandoned that project for a bit.
At this point I also started tearing into the carbs. They were a bit gummed up and in need of a cleaning. Both of the floats had been previously repaired, and one of them still had a leak, so I needed to drain it and re-solder it where the leak was. Of course, none of that got done until about 3 weeks ago, so I'm getting ahead of myself.
The rear sets that I had bought for the bike were a good fit, but they weren't going to work with the shift/brake links or the exhaust placement. I needed a replacement. Fast forward to March.
Somewhere along the line, I got sick of my workspace being cluttered and difficult to navigate. It was in desperate need of a serious douching and some organization. I found a great set of plans for a solid 6ft workbench on this Family Handyman Magazine website. I'm not putting a link in here because their site sucks and is wicked slow, but if you have some time on your hands and are looking for a nice bench, grab a cup of coffee and google it. The bench design is basic, but very strong. I'll get some photos of the finished product in the next post.
Its 12ft across the back of the garage, so I just needed to build two of them and get a solid sheet for the top. As luck would have it, the workbench that we had in the basement was 12ft across, and I figured it would just be best to take it apart and move it. Even after the big bench was done, I had enough extra materials to build a second bench on the side wall, so I made one that I could use for putting the grinder and vise on. Worked out great.
Fast forward again. Just a little bit. I've gone around and around with ideas for the seat. I've thought of reusing the original pan, building the pan/cowl out of wood, making one out of fiberglass, and just not using one and standing up all the time. I finally committed to fiberglass. There is an excellent video by Dime City Cycles that shows exactly how to do it, and it didn't look too bad, so I got started.
I haven't committed to a shape yet, but I'm leaning toward something like a Ducati Monster tail section. The design might require that I eliminate the rear fender completely and just attach the tail light directly to the cowl, but that has yet to be determined for sure.
Moving on, the air intakes were another puzzle that still needed to be solved. Because the frame has a large square down-tube in the middle, there is no way to directly attach pod filters (or even velocity stacks) to the carbs. I had to work out a way to sneak the filters out past the frame. After going to virtually every place in town that might potentially sell tube or hose that would work for this purpose, I managed to find what I needed.
Two different kinds of radiator hose got the job done. I'll get some clamps on there and figure out some way to make it look a bit more uniform. Probably some kind of black tape over the small hose the match the OD with the other hose. That should double as a stop when putting it all together. The filters tuck in pretty well, so I don't think there will be any leg clearance issues.
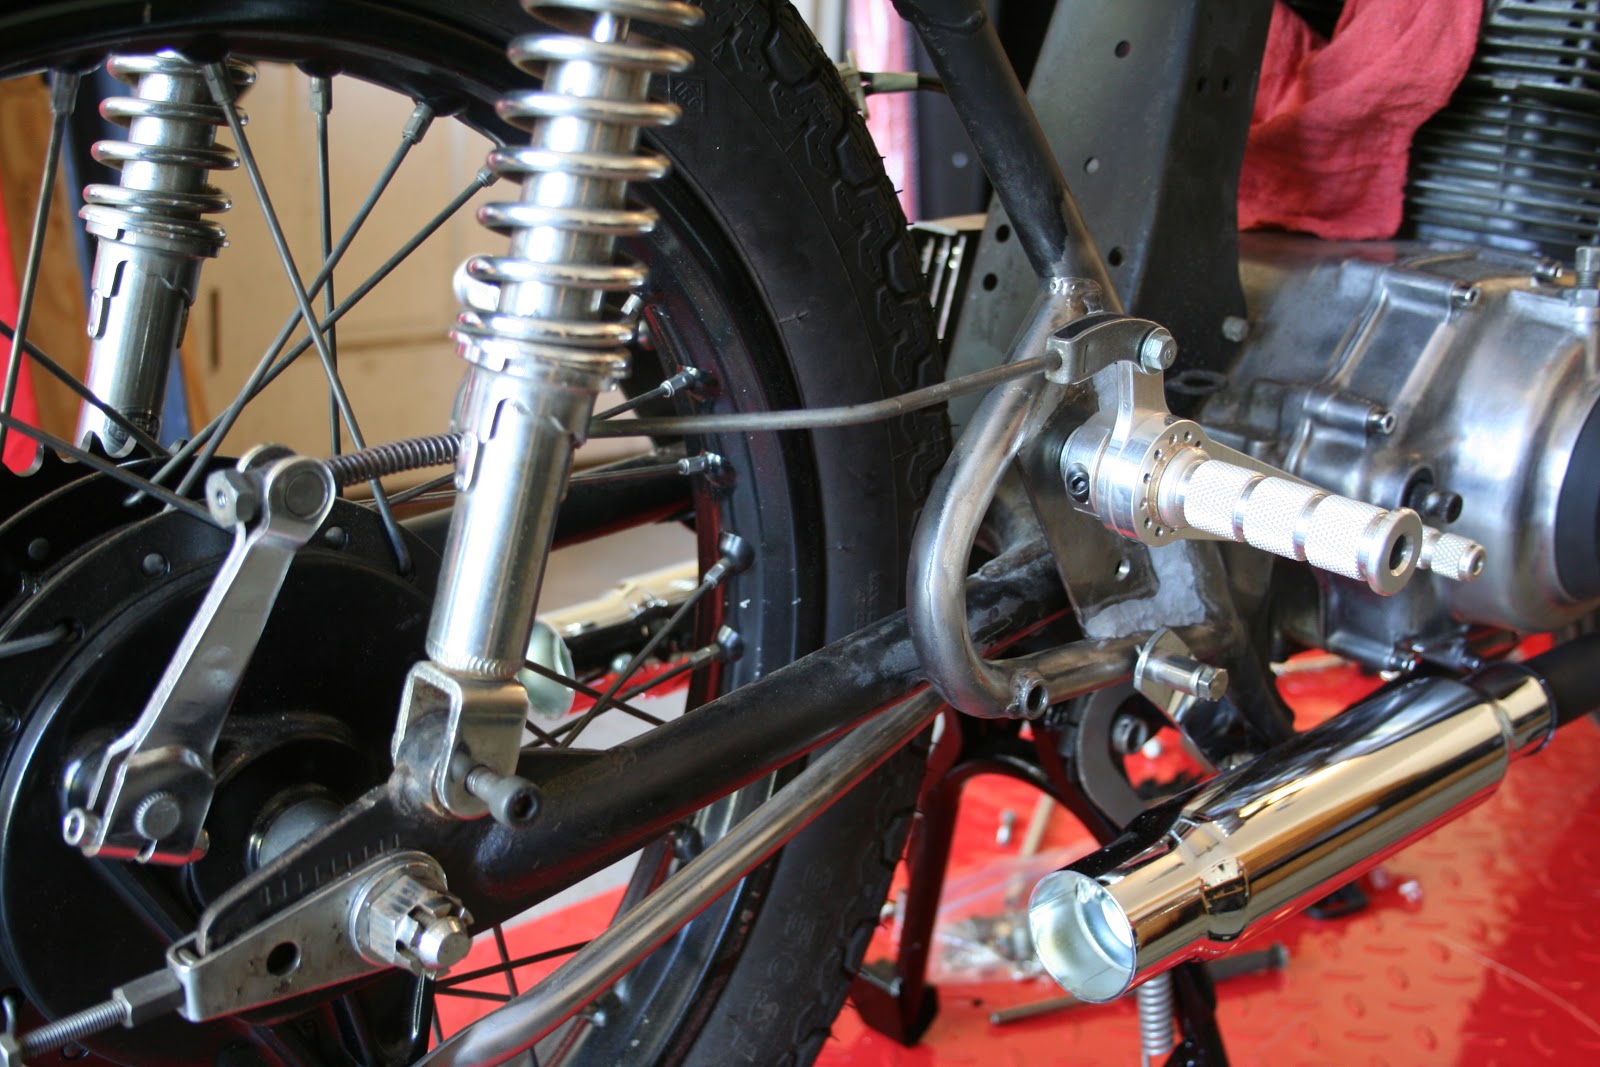
Shift linkages have been the bane of my existence for the last month or so, but I finally got it worked out. The star of the show is the new rear sets that I bought. Dime City Cycles makes some great gear, and these are no exception. They are fully indexable, which is perfect for these kinds of projects where a good amount of flexibility is needed.
The brake side proved to be the most difficult. The stock linkage tucks in near the bottom of the engine, which is a very different location than where it needs to be now. I ended up having to flip the arm for the brake to face upward, bend the rod, cut it shorter, and re-thread it. That did the job pretty well. Now I just have to replace the brake pads, since i can tell that there is waaaay to much play in the pedal throw. Since the bike only has 3500ish miles on it, I would be surprised it they've ever been replaced, so its probably a good idea anyway.
The shifter side was a bit easier. Rather than buying a new shifter arm, I decided to modify the stock one. I cut the peg off, shortened the arm a bit, and drilled a hole for the shift linkage to connect to it. That was about all.
Ah, yes. Exhaust brackets. The mufflers came with long chrome mounts for custom applications, so I decided to try and use them. I was able to use one of the existing threaded holes from the passenger foot pegs to mount the exhaust brackets. I had to cut them to length, drill a hole at the end, and bend each end of the bracket a little bit to fit right. It works great. The mufflers are solid, and the clamps aren't even tight yet.
Ok, two other kick ass updates. Thanks to the generous support of my father-in-law, the shop is now equipped with a hydraulic bike lift. This has made progress over the last few weeks go immensely faster and easier. My back is very grateful. So a big thanks to Mike! I have also acquired a coal stove from some family members who were replacing it with a pellet stove. I have all year to get it hooked up and ready to go, so I don't have any excuses for not getting any work done next winter. Thanks to Brenda and Bob for that!
More updates to come.